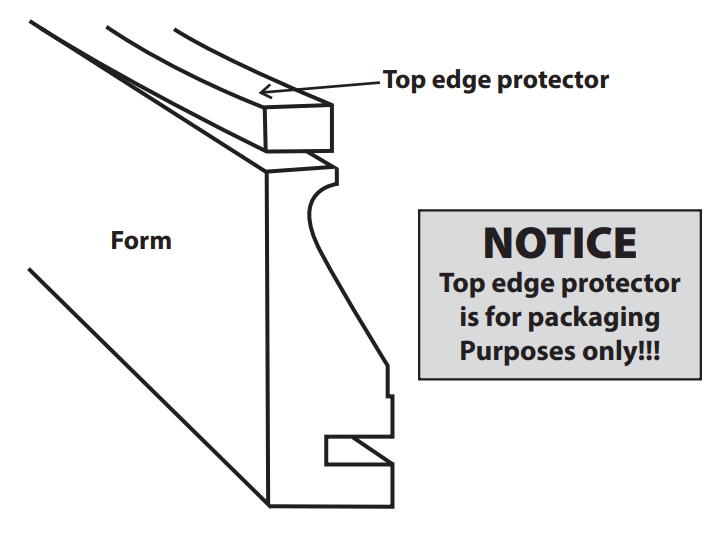
Break off and Discard Top edge protector Before using forms
Tile Setting Requirement
Tile must be set from the high point of the bond beam and bedded out level.
Scrape the top of the tile to remove any debris that would cause the tile strip to fit unevenly around the perimeter.
See Fig. A

Setting the Form
Peel the paper from the double faced tape (one foot at a time) and stick the form to the tile with the bottom of the decorative profile edge level with the top of the tile. The tile must be clean and free of dust before setting the form.
See Fig. B
Bending Instructions: Detailed form bending instructions are included with the Tie Wire Side Kit.
Note: During cold weather it may be necessary to warm the tile prior to sticking the form.

Placing the Tile Strip
Insert the tile strip into the notch provided in the form, making sure it is pressed down tight to the tile. Be sure to butt the joints together, as this strip will be visible in the finished product. See Fig. C

Bond Breaker
Cover the top of the bond beam with 15 lb. felt to act as a “bond breaker,” allowing the concrete deck to expand and contract without disturbing the tile. See Fig. D
Structural Considerations: If the installation is a coping pour, DO NOT apply a bond breaker as it is necessary to adhere the concrete to the bond beam.
Placing the Tie Wires
Drive the concrete nails (provided) into the bond beam 14 inches apart, 8 inches back from the tile. Place the plastic washer (provided) on the tie wire. Push the tie wires through the form, level with the top of the tile strip, applying pressure while wrapping securely around the nails. See Fig. D
Note: In addition to bracing the form, the tie wires also ensure that the tile strip stays securely in place.
Pouring While pouring, make sure to tap the forms to release air bubbles. This will help prevent honeycombing.

Stripping / Finishing
Once the concrete is strong enough to support its own weight, the forms should be removed. Twist the tie wire head. It will break the wire inside the concrete. See Fig. E
Note: Removing the forms one section at a time will help keep the moisture in the concrete to allow adequate time to finish.